Plugins are server-side add-ons that extend your Minecraft server with new features, commands, and gameplay mechanics. This guide covers how to install, verify, and configure plugins on your server.
Supported Server Types
Plugins only work on server software that supports the Bukkit/Spigot plugin API. If your server runs Vanilla, Forge, or Fabric, you will need to switch to a compatible server type first.
| Server Type | Supports Plugins |
|---|---|
| Paper | Yes (recommended) |
| Purpur | Yes |
| Spigot | Yes |
| CraftBukkit | Yes (legacy, not recommended) |
| Vanilla | No |
| Forge | No (uses mods instead) |
| Fabric | No (uses mods instead) |
Note: Plugins built for Bukkit or Spigot will also work on Paper and Purpur. Paper is recommended for the best performance and broadest plugin compatibility.
If you need to switch your server type, see Uploading a Custom Server Jar
Installing Plugins with the Plugin Browser
The easiest way to install plugins is through the built-in Plugin Browser in the Game Panel. It lets you search, install, and update plugins directly from your browser without downloading any files.
Step-by-Step
- Log in to the Game Panel
- Select your server
- In the left menu, click Game
- Select Plugins
- Use the search bar to find a plugin, or browse by category
- Select your plugin loader (e.g., Paper, Spigot, Bukkit) and provider
- Click the plugin you want, then click Install
- Restart your server for the plugin to take effect
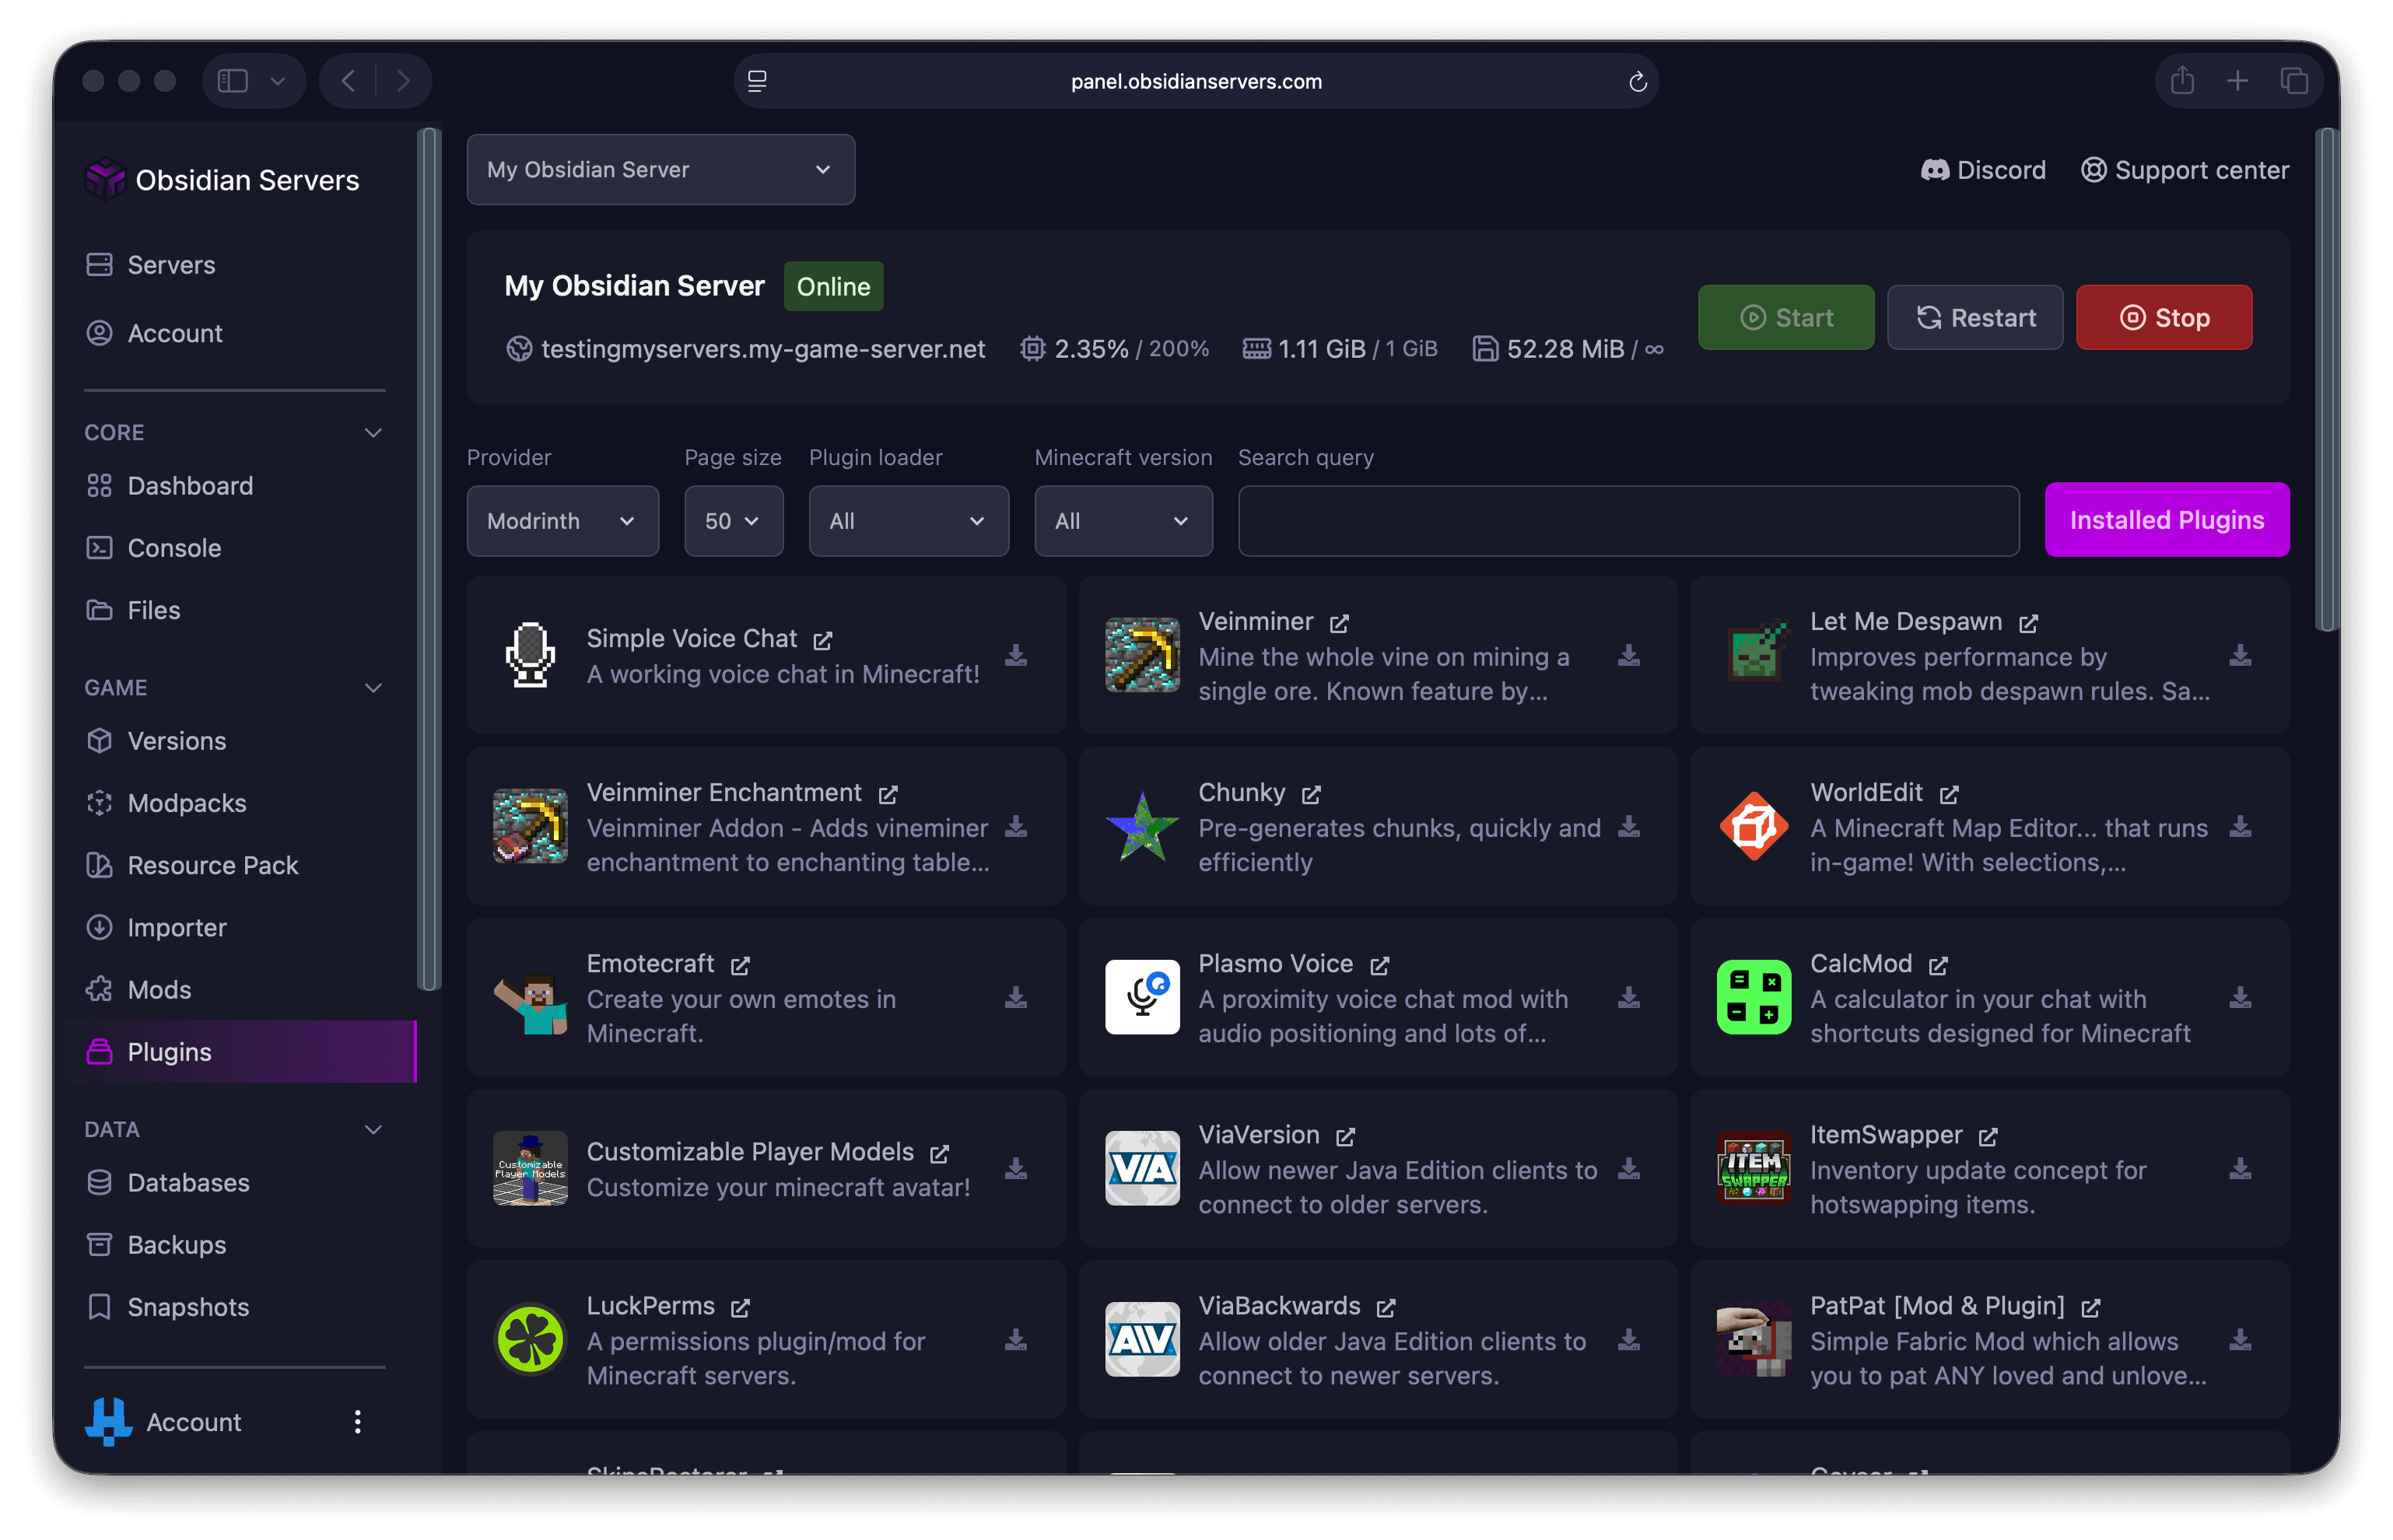
The Plugin Browser supports plugins from CurseForge, Modrinth, Hangar, SpigotMC, Craftaro, and Polymart.
Checking for Updates
- Go to Game > Plugins
- Switch to the Installed tab to see all your installed plugins
- If an update is available, you can update with one click
- Restart your server after updating
Installing Plugins Manually
If a plugin is not available in the Plugin Browser (for example, a premium plugin or a private plugin), you can upload it manually.
Where to Download Plugins Safely
Only download plugins from trusted sources:
- Modrinth - Open-source plugin repository
- SpigotMC - Largest plugin marketplace
- Hangar - PaperMC's plugin repository
- CurseForge - Well-known modding platform
- Bukkit Dev - Classic Bukkit plugin repository
Warning: Avoid downloading plugins from unofficial websites, Discord servers, or file-sharing sites. These can contain malware that compromises your server.
Uploading via the File Manager
- Download the plugin
.jarfile to your computer from one of the trusted sources above - Log in to the Game Panel
- Select your server
- Go to Core > Files
- Navigate to the
pluginsfolder - Click Upload and select the plugin JAR file, or drag and drop it into the browser
- Restart your server
Uploading via SFTP
For larger plugins or bulk uploads, SFTP can be more reliable:
- Connect to your server via SFTP (your credentials are in Settings > Settings)
- Navigate to the
pluginsfolder - Upload the plugin
.jarfile - Restart your server
For full SFTP setup instructions, see How to Access and Manage Server Files.
Verifying Plugins are Working
After restarting your server, there are two ways to confirm a plugin loaded correctly.
Check the Console
During startup, your server logs each plugin as it loads. Look for messages like:
[Server thread/INFO]: [PluginName] Enabling PluginName v1.0
[Server thread/INFO]: [PluginName] Plugin has been enabled!
If a plugin fails to load, you will see an error message with details about what went wrong.
Use the /plugins Command
Type /plugins in the server console or in-game chat. This displays a list of all plugins:
- Green names are loaded and working
- Red names failed to load
Configuring Plugins
Most plugins generate configuration files the first time they run. These files let you customise the plugin's behaviour.
Locating Config Files
Plugin configs are stored in plugins/PluginName/. The most common config file is config.yml, but some plugins create additional files.
- Go to Core > Files
- Navigate to
plugins/PluginName/ - Click on
config.ymlto open it in the built-in editor
Editing and Saving
- Make your changes in the editor
- Click Save or press
Ctrl + S(Windows/Linux) or⌘ + S(Mac) - Most changes require a server restart to take effect. Some plugins support
/pluginname reload, but a restart is more reliable.
Tip: YAML files are sensitive to indentation. Use spaces (not tabs) and keep the existing formatting structure when editing.
Troubleshooting
Plugin Not Loading
If a plugin does not appear in /plugins:
- Check your server type - Plugins only work on Paper, Spigot, Purpur, or CraftBukkit. If you are running Vanilla, Forge, or Fabric, plugins will not load
- Check the file location - The
.jarfile must be directly inside thepluginsfolder, not in a subfolder - Check the file extension - Make sure the file ends in
.jarand was not renamed to.jar.zipduring download
Plugin Not Compatible with Your Minecraft Version
If the console shows version errors when a plugin loads:
- Check the plugin's page for supported Minecraft versions
- Download the correct version of the plugin for your server
- Remove the old
.jarfile from thepluginsfolder before uploading the new one
Missing Dependencies
Some plugins require other plugins to work. If you see errors mentioning a missing dependency:
- Check the plugin's page for a list of required dependencies
- Install the missing plugins using the same methods above
- Restart your server
Plugin Conflicts
If your server becomes unstable after installing a new plugin:
- Stop your server
- Remove the most recently added plugin
.jarfrom thepluginsfolder - Start your server to confirm the issue is resolved
- Check the plugin's page for known incompatibilities
Server Will Not Start After Installing a Plugin
If your server crashes on startup:
- Check the console for the error message - it usually names the plugin causing the issue
- Connect via SFTP or the File Manager and remove the plugin
.jarfrom thepluginsfolder - Start your server again
- If you need the plugin, check for an updated version or open a support ticket for help
Related Guides
- Choosing a Server Version (JAR Types) - Switch to a plugin-compatible server type
- How to Access and Manage Server Files - File manager and SFTP setup
- Using the Backup System - Back up your server before making changes
- Troubleshooting Server Lag - Diagnose performance issues caused by plugins
Need Help?
If you are having trouble installing or configuring a plugin:
- Support Ticket
- Discord Server - use the
/supportcommand - Email: [email protected]