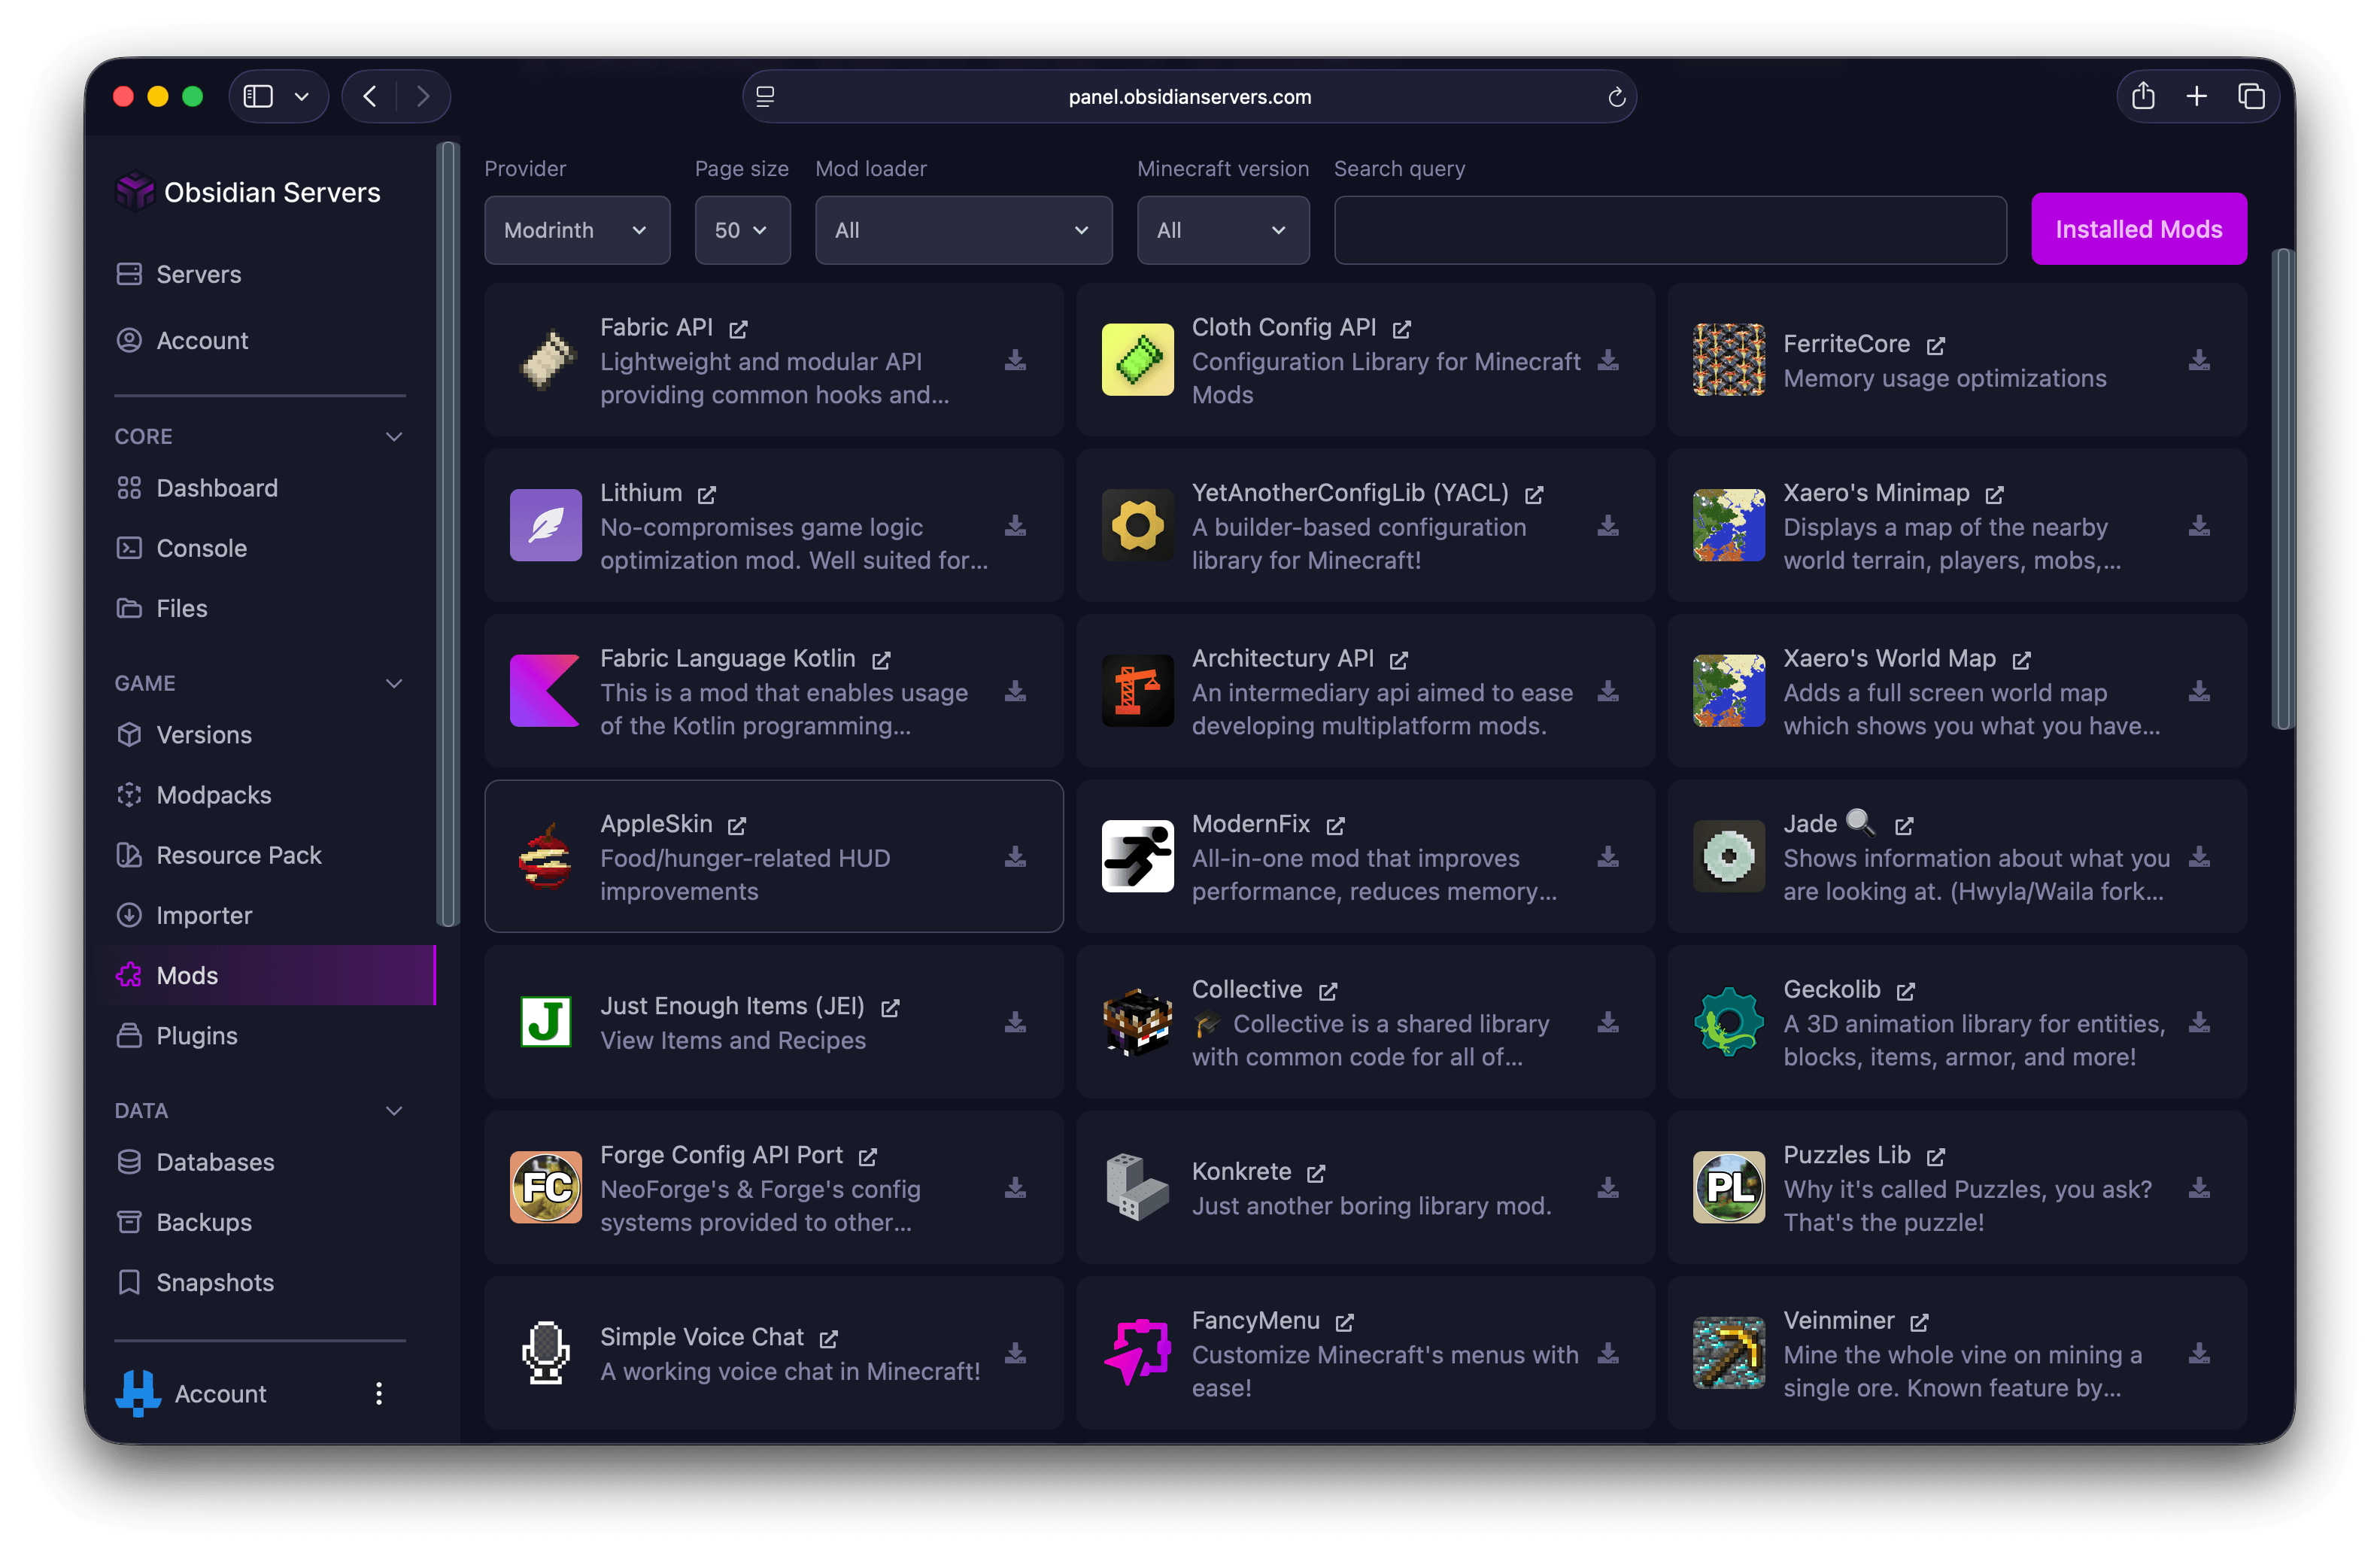
The Game Panel includes a built-in mod browser that lets you search, install, update, and remove mods directly from your browser. It supports mods from CurseForge and Modrinth, and works with mod loaders like Forge, NeoForge, and Fabric.
Note: Mods are different from plugins. Mods require a mod loader (such as Forge or Fabric) as your server software, while plugins run on plugin-based servers like Paper or Spigot. If you are looking to install plugins, see How to Install Plugins on Your Server.
Accessing the Mod Browser
- Log in to the Game Panel
- Select your server
- In the left menu, click Game
- Select Mods
The mod browser will automatically detect your server's mod loader and Minecraft version and use them as the default filters.
Searching for Mods
At the top of the mod browser, you can filter your search using the following options:
- Provider - Choose between CurseForge and Modrinth (Modrinth is selected by default)
- Mod Loader - Filter by your mod loader (Forge, NeoForge, Fabric, LiteLoader, Quilt, and others)
- Minecraft Version - Filter to only show mods compatible with your server's version
- Search - Type a mod name or keyword to search
- Page Size - Choose how many results to show per page (10, 25, or 50)
Each mod in the results shows its name, a short description, and a link to its page on the provider's website.
Installing a Mod
- Find the mod you want to install
- Click the Download button next to it
- In the dialog that appears, select the version you want to install from the dropdown
- Confirm the installation
The mod file will be downloaded and placed in your server's mods folder automatically. Restart your server for the mod to take effect.
Viewing Installed Mods
To see which mods are currently installed on your server:
- Go to the Mods page
- Click Installed Mods
This shows all mods in your mods folder, including each mod's name, current version, and icon.
Updating a Mod
When a newer version of an installed mod is available, an update icon will appear on the mod card.
- Go to Installed Mods
- Find the mod with an available update
- Click the update icon
- Confirm the update
The old version will be removed and the new version will be installed in its place. Restart your server after updating.
Removing a Mod
- Go to Installed Mods
- Find the mod you want to remove
- Click the remove icon
- Confirm the removal
The mod file will be deleted from your mods folder. Restart your server for the change to take effect.
Tips
- Always restart your server after installing, updating, or removing mods for the changes to take effect
- Check compatibility before installing - make sure the mod supports both your mod loader and your Minecraft version
- Back up your server before installing new mods, especially if you are adding several at once. See Using the Backup System for details
- Check mod dependencies - some mods require other mods to work (such as library mods). The mod's page on CurseForge or Modrinth will list any required dependencies
Installing Mods Manually
If a mod is not available through the built-in browser, you can install it manually:
- Download the mod
.jarfile from a trusted source - Upload it to the
modsfolder on your server using the File Manager or SFTP - Restart your server
For help with uploading files, see How to Access and Manage Server Files.
Need Help?
If you encounter any issues or need further assistance, you can reach us through:
- Support Ticket
- Discord Server - use the
/supportcommand - Email: [email protected]