Welcome to Obsidian Servers! This guide will walk you through accessing your server for the first time, understanding the Game Panel, and connecting to your server in Minecraft.
Accessing the Game Panel
Your Game Panel account is created automatically when your first server is provisioned. It uses the same login credentials as your Billing Account, so there is no separate registration required.
- Go to the Game Panel
- Enter your Billing Account email and password (the same details you use at billing.obsidianservers.com)
- Click Login
Note: If you change your Billing Account password, your Game Panel password will update automatically.
Once logged in, you will see your dashboard with all your servers listed.
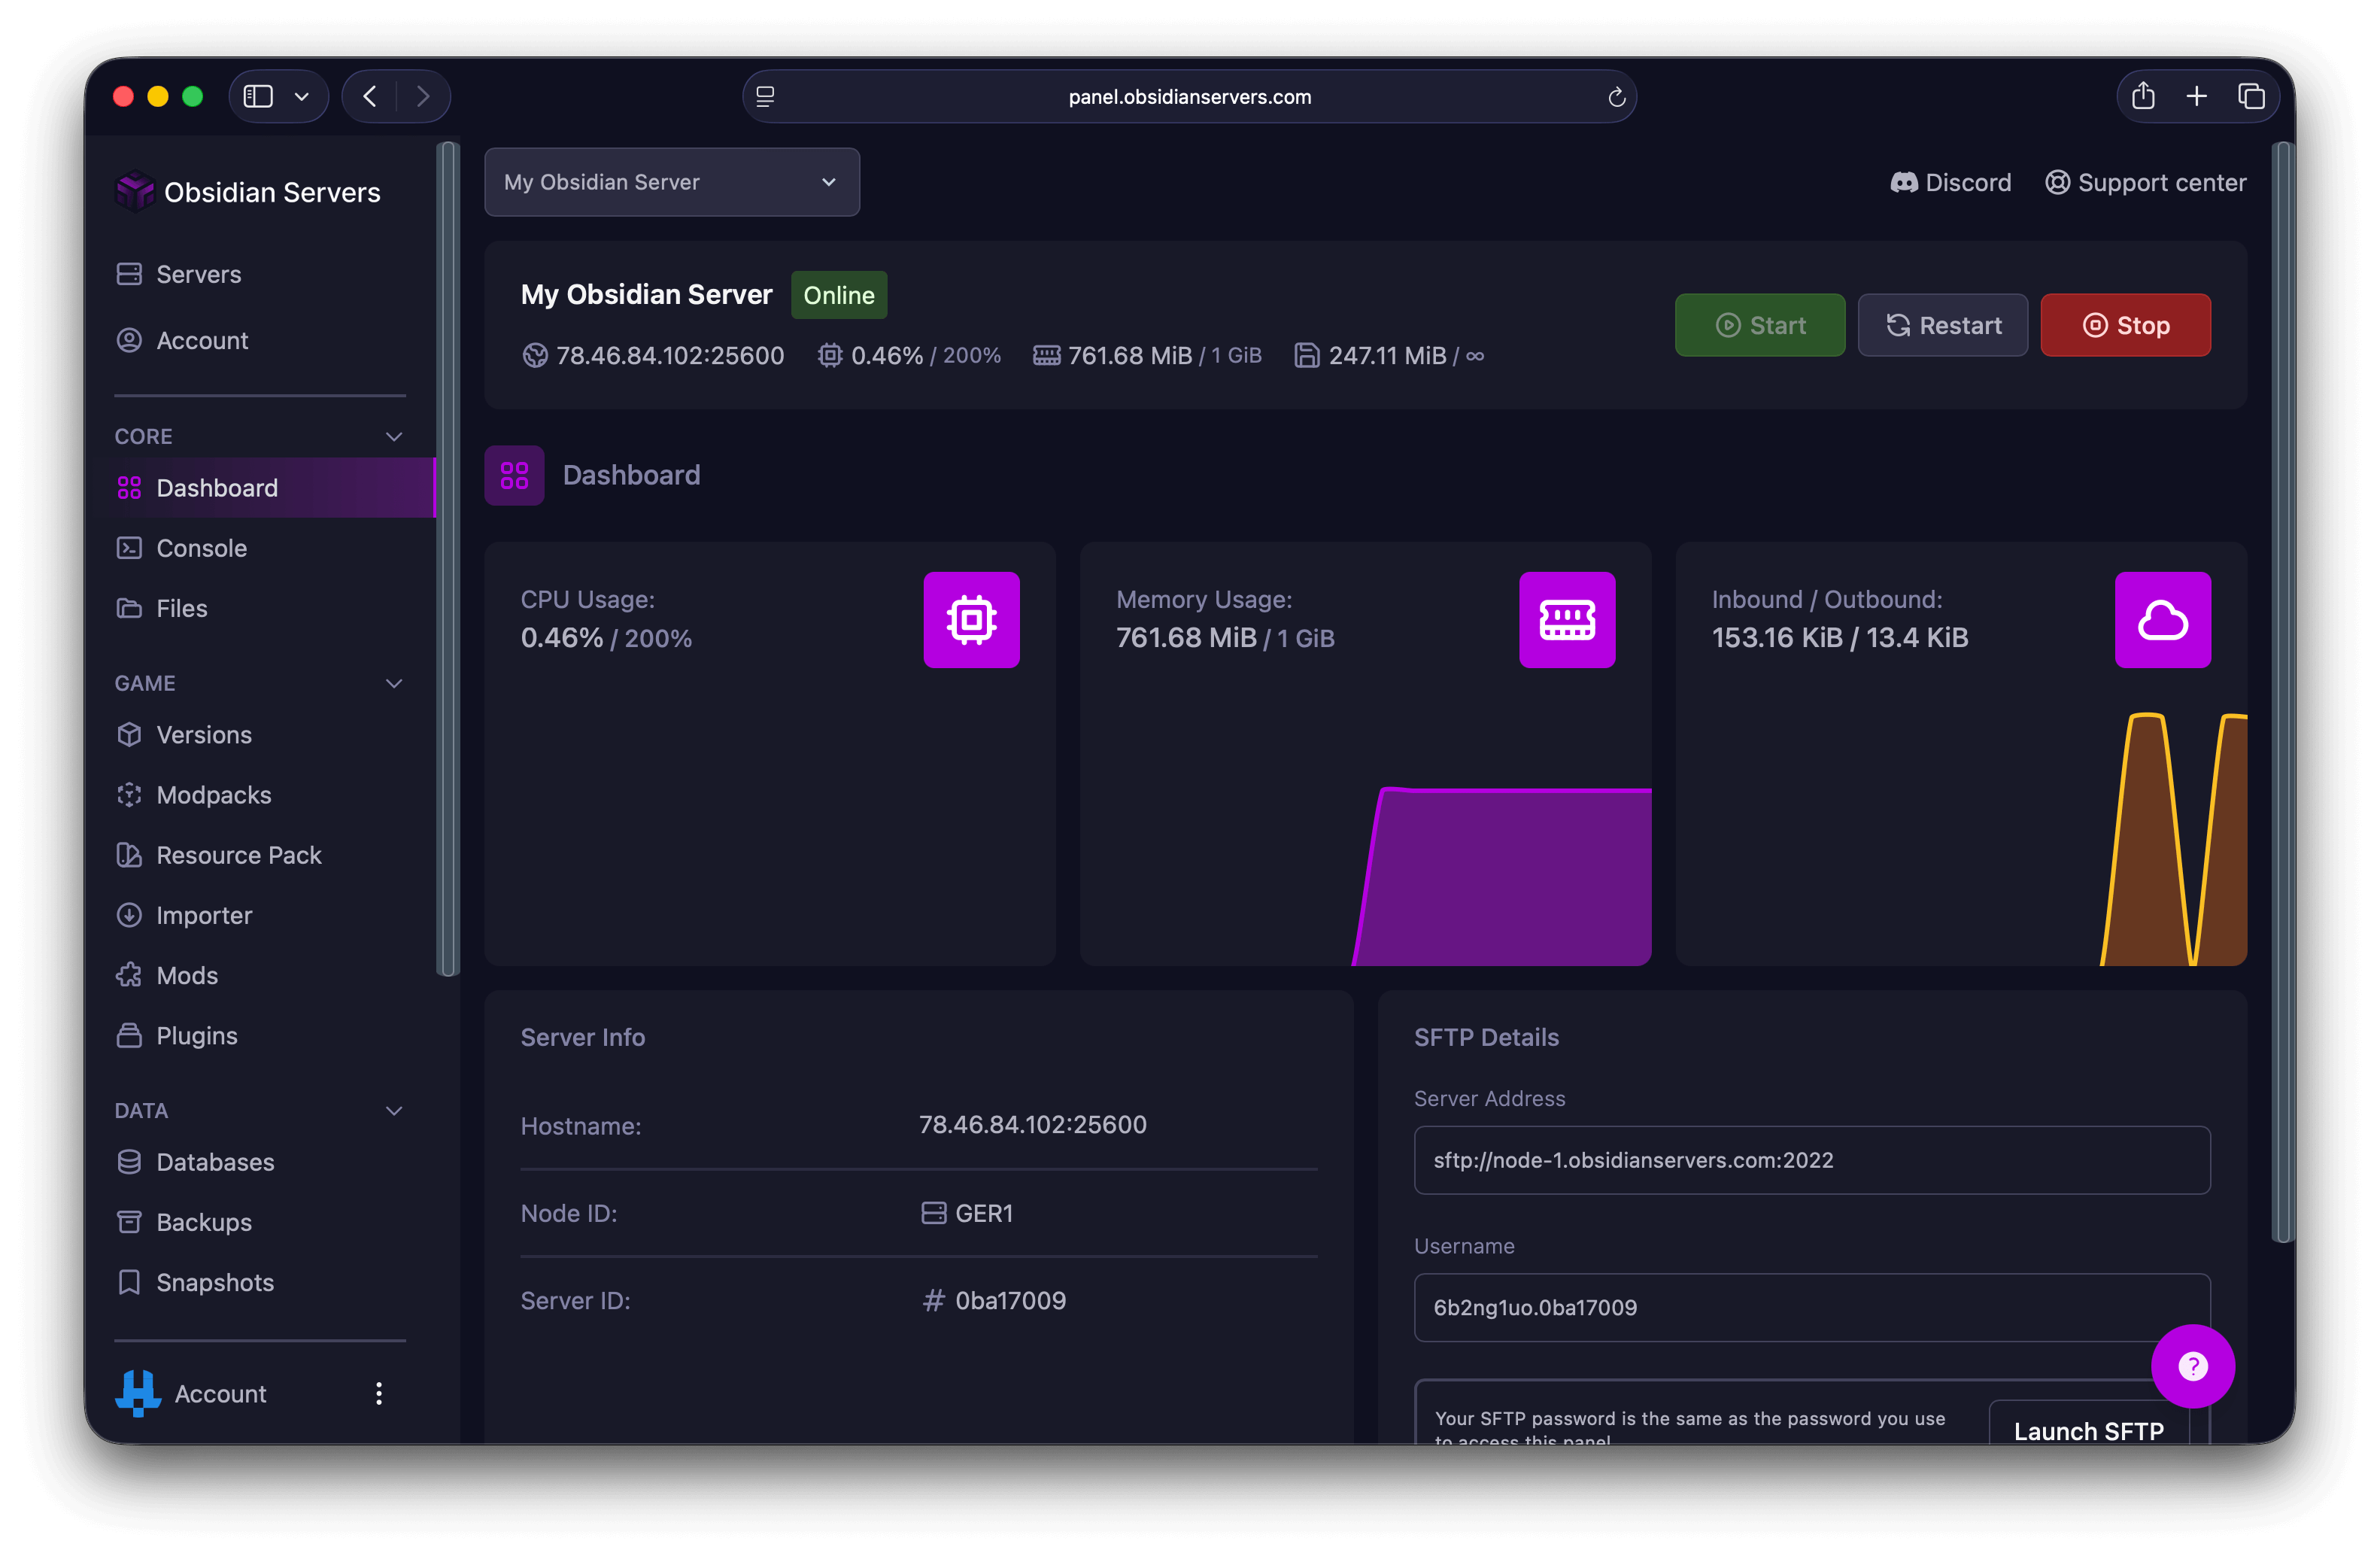
Click on your server to open the server management page.
Understanding the Panel Interface
The Game Panel is where you manage everything about your server. Here is an overview of the main sections.
Console
The Console is your server's command centre. This is the first page you see when selecting a server.

What you will find here:
- Live server output - See everything happening on your server in real-time
- Command input - Type commands at the bottom to send them to your server
- Resource usage - View CPU, RAM, and network usage
- Power controls - Start, stop, restart, or kill your server
File Manager
The File Manager lets you browse and edit your server files directly in your browser.
To access it:
- Click Core in the left menu
- Select Files
What you can do here:
- Upload and download files
- Edit configuration files
- Create new files and folders
- Extract ZIP files
Settings
The Settings page contains your server details and SFTP access information.
To access it:
- Click Settings in the left menu
- Select Settings
What you will find here:
- Server name (you can change this)
- SFTP connection details for file transfers
- Server reinstall option
Starting, Stopping, and Restarting Your Server
The power controls are located at the top of the Console page.
| Button | What it does |
|---|---|
| Start | Turns on your server |
| Restart | Stops and starts your server (use for applying changes) |
| Stop | Gracefully shuts down your server |
| Kill | Forces the server to stop immediately (use only if Stop does not work) |
Starting Your Server
- Go to the Console page
- Click the Start button
- Watch the console for startup messages
- Your server is ready when you see "Done" in the console output
Stopping Your Server
- Go to the Console page
- Click the Stop button
- Wait for the server to shut down gracefully
- The console will show the server has stopped
Tip: Always use Stop before making changes to important files like world data or plugin configurations.
Restarting Your Server
After making configuration changes, you will need to restart your server for them to take effect.
- Go to the Console page
- Click the Restart button
- Wait for the server to stop and start again
Finding Your Server IP Address
Your server's connection address is displayed in several places.
On the Dashboard
Your server's address is shown on the server card on your dashboard.
On the Console Page
The connection address is also displayed at the top of the Console page.
Connection Address Format
Your connection address will look like one of these:
- IP and port:
123.456.78.90:25566 - Subdomain:
your-server.obby.host
If your address includes a port number (the numbers after the colon), you will need to include it when connecting.
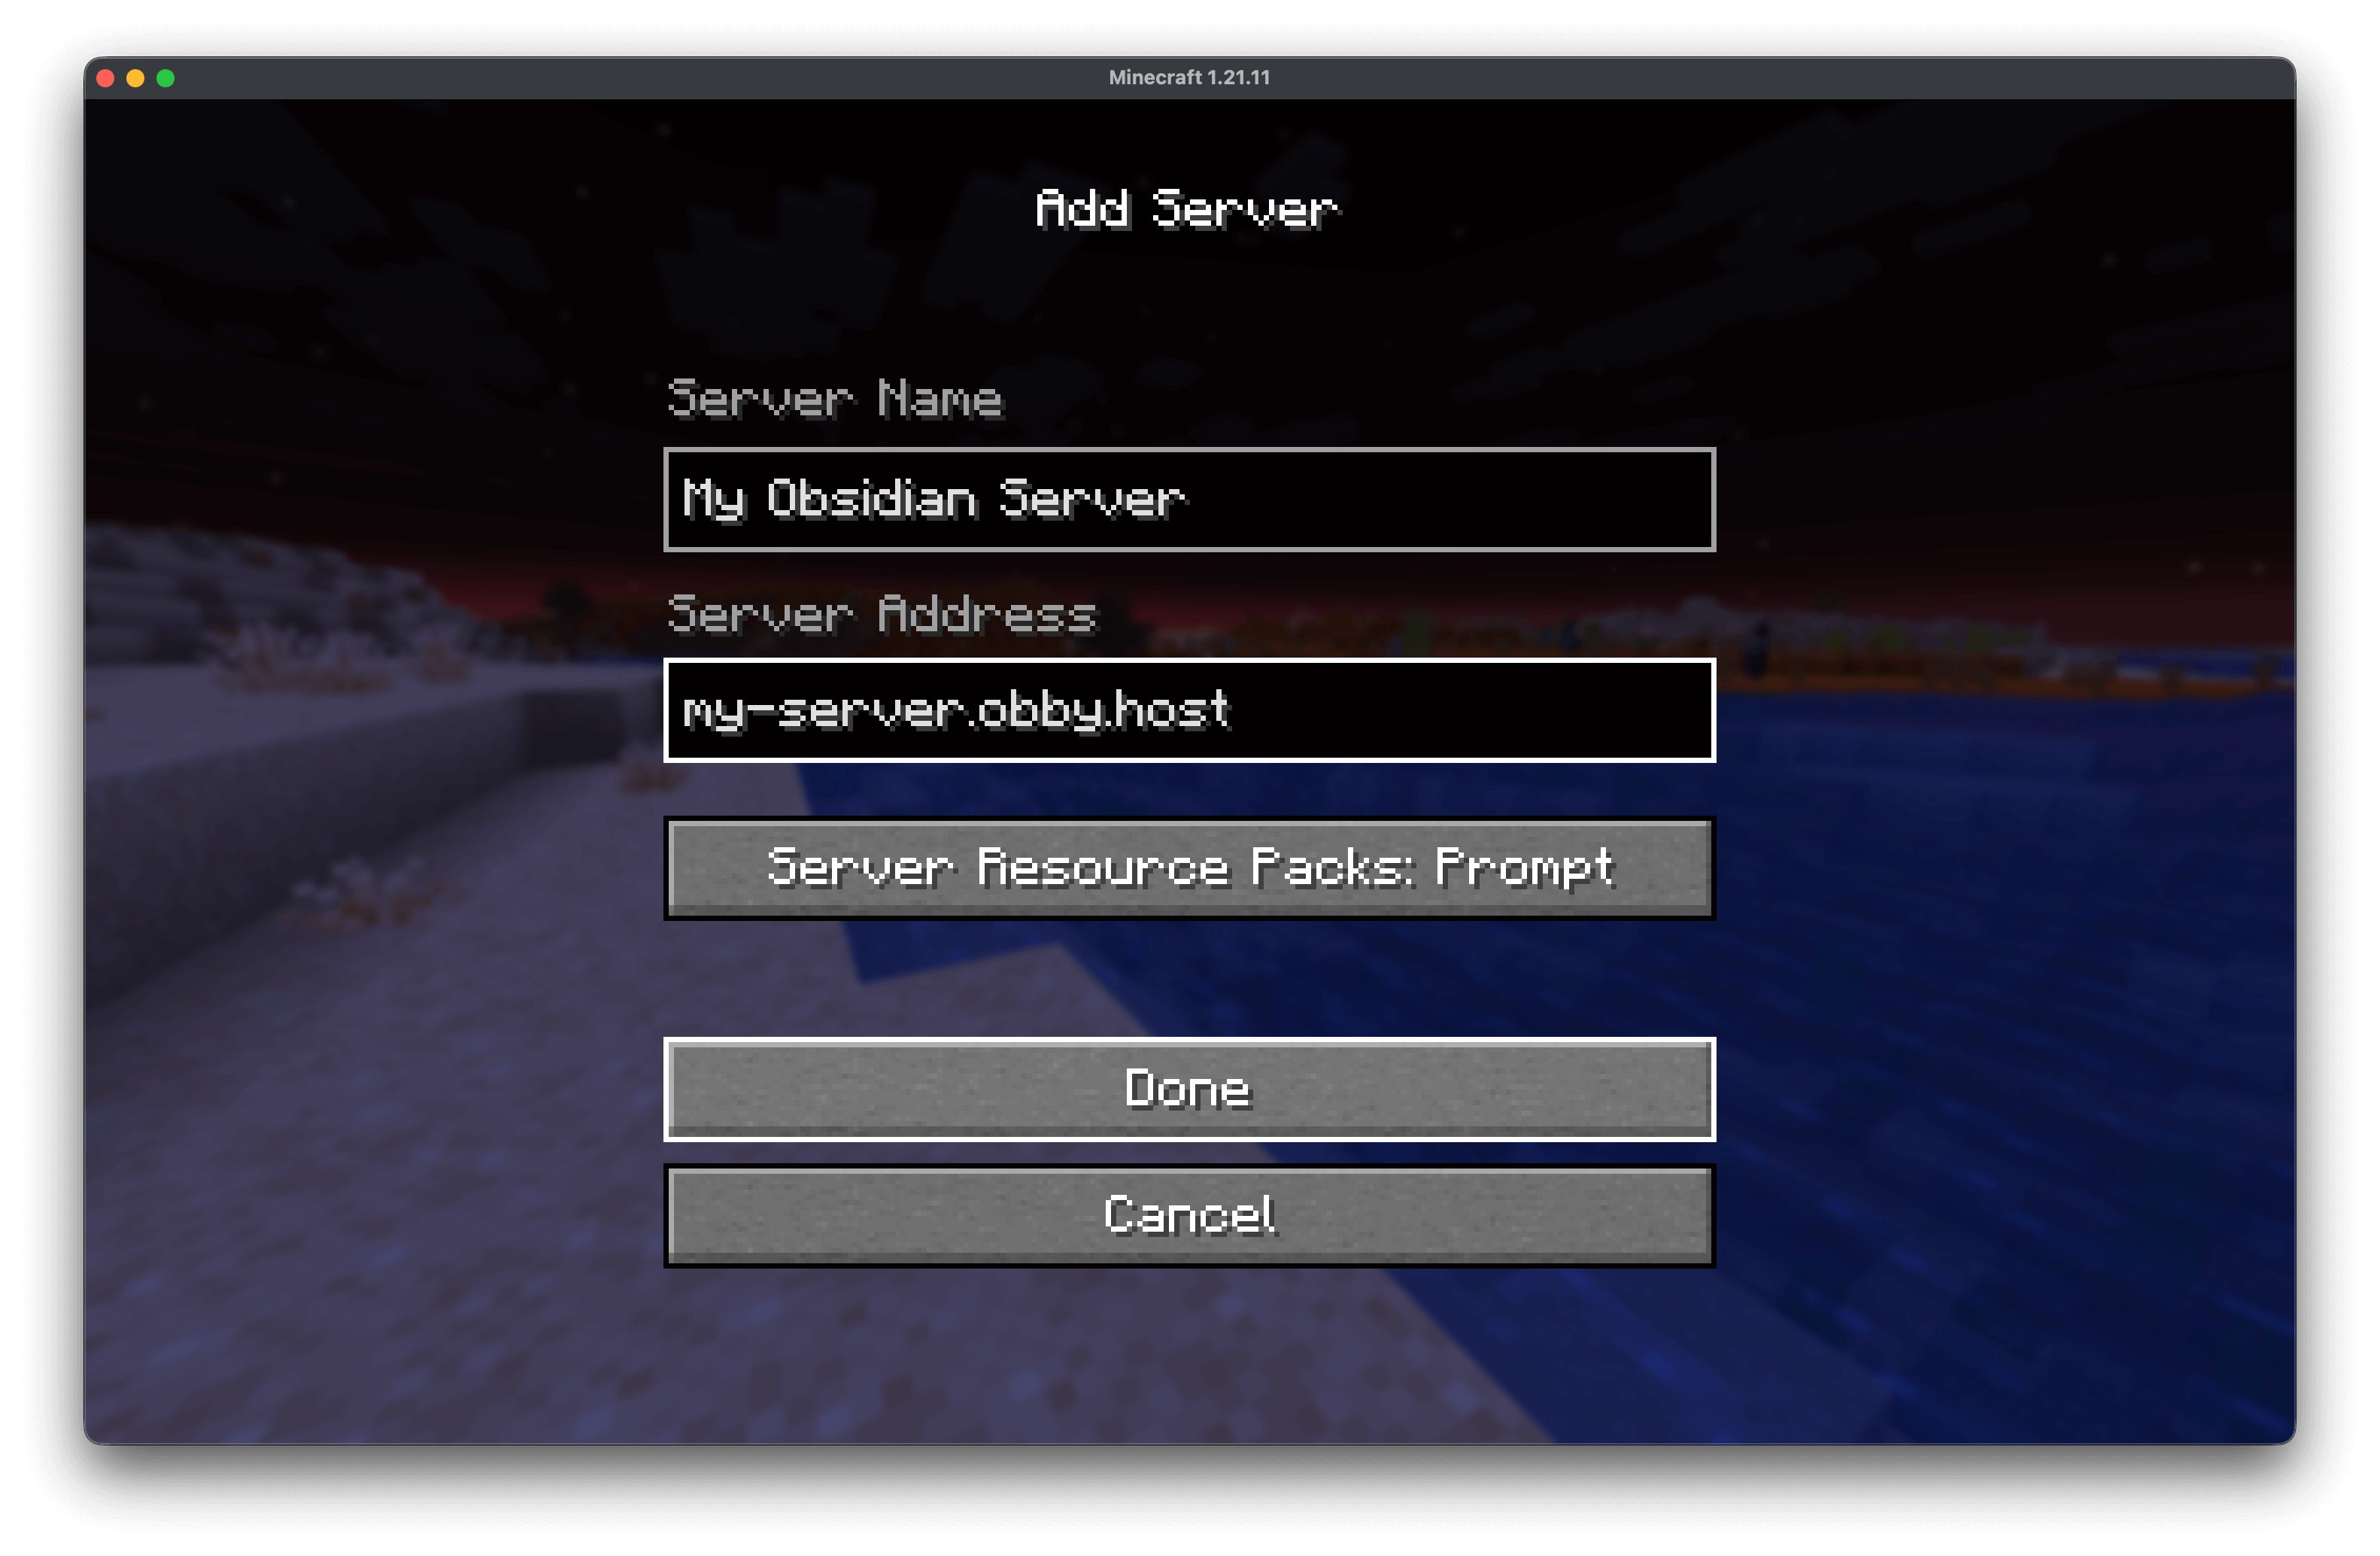
Connecting to Your Server
Now that your server is running, you can connect to it in Minecraft.
Step 1: Copy Your Server Address
Copy the connection address from your Game Panel (either from the dashboard or console page).
Step 2: Open Minecraft
- Launch Minecraft Java Edition
- Click Multiplayer
Step 3: Add Your Server
- Click Add Server
- Enter a name for your server (this is just for your reference)
- Paste your server address in the Server Address field
- Click Done
Step 4: Connect
- Select your server from the list
- Click Join Server
You should now be connected to your server!
First Steps After Connecting
Now that you are in your server, here are some things you might want to do:
Make Yourself an Operator
To access admin commands in-game, you need to give yourself operator status.
- Go to the Console page in the Game Panel
- Type
op YourMinecraftUsername(replace with your actual username) - Press Enter
You will now have access to all server commands in-game.
Configure Your Server
Common settings you might want to change:
- Server properties - Edit
server.propertiesin the File Manager to change game settings like difficulty, PVP, and player limits - Server icon - Upload a 64x64 PNG image named
server-icon.pngto your server's root directory - Message of the Day (MOTD) - Change the
motdline inserver.propertiesto customise the message players see in their server list
Where to Find Help
Knowledge Base
We have articles covering many common topics:
- Basic Minecraft Server Commands - Essential commands for managing your server
- How to Access and Manage Server Files - Using the file manager and SFTP
- How to Install a World onto Your Server - Uploading custom worlds
- Connecting a Custom Domain - Using your own domain name
Contact Support
If you cannot find the answer in our knowledge base, our support team is here to help:
- Support Ticket - Best for detailed issues
- Discord Server - Use the
/supportcommand for quick help - Email: [email protected]